Kaluma is a tiny and efficient JavaScript runtime for RP2040 and RP2350 (Raspberry Pi Pico, Pico-w, Pico2, Pico2-W). The main features are:
- Small footprint. Runs minimally on microcontrollers with 300KB ROM with 64KB RAM.
- Support modern JavaScript standards (ECMAScript 5/6/6+). Powered by JerryScript.
- Has internal event loop like as Node.js for asynchronous.
- Has built-in modules including file systems (LittleFS, FAT), graphics, networking and more.
- Support RP2's PIO (Programmable I/O) inline assembly in JavaScript code.
- Provides very friendly API that resembles Node.js and Arduino.
Installation
- Get a Raspberry Pi Pico board or other RP2040 board.
- Get a Raspberry Pi Pico2 board or other RP2350 board.
- Download firmware .UF2 file.
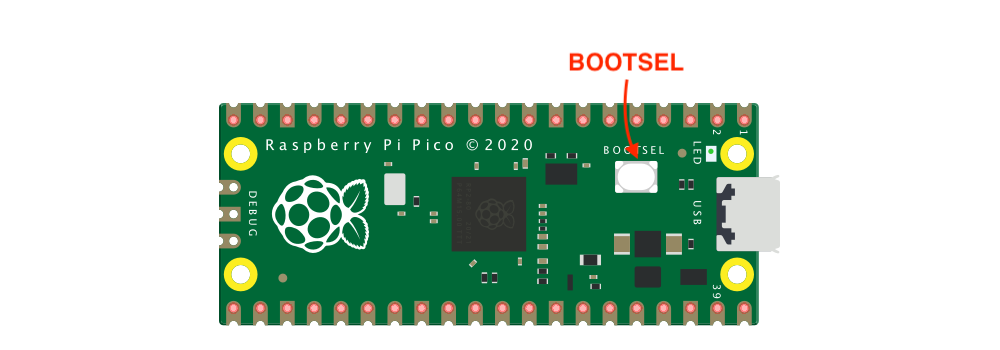
- Push and hold the BOOTSEL button and plug into USB port of your computer, and then release the button. It will mount as USB storage device named RPI-RP2.
- Drag and drop the downloaded .UF2 onto the RPI-RP2 volume. Your Pico will reboot automatically.
Quick Start
Write the first blink code with any text editor.
The very simple code without any external HW component is LED blinking code if your board has on board LED.
pico and pico2 board has on board LED connected to GPIO 25. If your board is officially supported by Kaluma, you can use
board.LEDconstant.
// index.js
const led = board.LED  // board.LED=25 for pico, pico2 board because GPIO 25 is connected to on board LED.
pinMode(led, OUTPUT);
setInterval(() => {
  digitalToggle(led);
}, 1000);
pico-w and pico2-w board has on board LED connected to WIFI module. General GPIO can't control on board LED. This is special on board LED blinking example code for pico-w and pico2-w board only.
// index.js
const { PicoCYW43 } = require('pico_cyw43');
const pico_cyw43 = new PicoCYW43();

// Blink on-board LED
setInterval(() => {
  if (pico_cyw43.getGpio(0)) {
    pico_cyw43.putGpio(0, false); // turn-off LED
  } else {
    pico_cyw43.putGpio(0, true); // turn-on LED
  }
}, 1000);
To upload code to your board, we need Kaluma CLI. Of course, it is assumed that Node.js is installed.
$ npm install -g @kaluma/cliUse flash command of CLI to upload index.js to your board. CLI automatically finds a serial port which Raspberry Pi Pico is connected. If you want to specify a serial port to upload code, use --port option.
$ kaluma flash index.jsAfter uploading successfully, you will see a blinking LED on the board.